https://www.marksymondsroofing.com/blogs/stamp-club.atom marksymondsroofing - Stamp Club 2023-06-29T16:00:03+01:00 marksymondsroofing https://www.marksymondsroofing.com/blogs/stamp-club/woodland-harvest 2023-06-29T16:00:03+01:00 2023-07-07T10:25:43+01:00 Stamp Club - Woodland Harvest Shopify API

Stamp Club - Woodland Harvest

Introducing 'Woodland Harvest' - the next great addition to our ever popular Stamp Club range! 


Create adorable Autumn decorations for your greeting cards and craft projects with this brand-new addition to the Stamp Club range. Featuring beautifully illustrated character stamps & Harvest-themed images that work seamlessly alongside charming sentiments – crafting standout cards couldn't be easier!


Don't forget, active Tonic Craft Kit Subscribers get 10% off their basket using the discount code "TCK" at checkout too!

]]>
https://www.marksymondsroofing.com/blogs/stamp-club/a-very-bug-deal 2023-04-27T16:00:09+01:00 2023-04-27T16:00:11+01:00 Stamp Club - A Very Bug Deal Shopify API

Stamp Club - A Very Bug Deal

Introducing 'A Very Bug Deal' - the next great addition to our ever popular Stamp Club range! 


Create gorgeous cutesy-crawly scenes with this newest addition to our ever-popular Stamp Club range. Packed with delightful stamps and a host of dies designed to take the fuss out of fussy cutting around them. This adorable collection is ideal for crafting, simple and fun cards!


Don't forget, active Tonic Craft Kit Subscribers get 10% off their basket using the discount code "TCK" at checkout too!

]]>
https://www.marksymondsroofing.com/blogs/stamp-club/good-times-ahead 2023-02-23T15:43:35+00:00 2023-02-23T15:43:36+00:00 Stamp Club - Good Times Ahead Shopify API

Stamp Club - Good Times Ahead

Introducing 'Good Times Ahead' - the next great addition to our ever popular Stamp Club range! 


Create gorgeous fruity scenes with this newest addition to our ever-popular Stamp Club range. Packed with delightful stamps and a host of dies designed to take the fuss out of fussy cutting around them. This adorable collection is ideal for crafting, simple and fun cards!

Don't forget, active Tonic Craft Kit Subscribers get 10% off their basket using the discount code "TCK" at checkout too!

]]>
https://www.marksymondsroofing.com/blogs/stamp-club/one-in-a-melon 2023-01-26T16:00:01+00:00 2023-03-13T16:29:41+00:00 Stamp Club - One in a Melon Shopify API

Stamp Club - One in a Melon

Introducing 'One in a Melon' - the next great addition to our ever popular Stamp Club range! 


Create gorgeous fruity scenes with this newest addition to our ever-popular Stamp Club range. Packed with delightful stamps and a host of dies designed to take the fuss out of fussy cutting around them. This adorable collection is ideal for crafting, simple and fun cards!


Don't forget, active Tonic Craft Kit Subscribers get 10% off their basket using the discount code "TCK" at checkout too!

]]>
https://www.marksymondsroofing.com/blogs/stamp-club/good-vibes 2022-11-14T00:00:03+00:00 2022-11-17T16:11:28+00:00 Stamp Club - Good Vibes Shopify API

Stamp Club - Good Vibes

Introducing 'Good Vibes - the next great addition to our ever popular Stamp Club range! 


Introducing ‘Rawr-some Dinosaurs’, the fun new addition to our ever-popular Stamp Club range! This incredible bundle includes a collection of adorable dinosaurs stamps, a selection of amusing sentiments, plus all the dies you’ll need for effortless fussy-cutting! Perfect for crafting the most delightful cards for both the young and the young at heart!


Don't forget, active Tonic Craft Kit Subscribers get 10% off their basket using the discount code "TCK" at checkout too!

]]>
https://www.marksymondsroofing.com/blogs/stamp-club/rawr-some-dinosaurs 2022-10-27T15:49:11+01:00 2023-03-13T16:24:16+00:00 Stamp Club - Rawr-Some Dinosaurs Shopify API

Stamp Club - Rawr-some Dinosaurs

Introducing 'Rawr-some Dinosaurs' - the next great addition to our ever popular Stamp Club range! 


Introducing ‘Rawr-some Dinosaurs’, the fun new addition to our ever-popular Stamp Club range! This incredible bundle includes a collection of adorable dinosaurs stamps, a selection of amusing sentiments, plus all the dies you’ll need for effortless fussy-cutting! Perfect for crafting the most delightful cards for both the young and the young at heart!


Don't forget, active Tonic Craft Kit Subscribers get 10% off their basket using the discount code "TCK" at checkout too!

]]>
https://www.marksymondsroofing.com/blogs/stamp-club/golden-sunrise 2022-09-29T16:00:00+01:00 2022-09-29T16:00:03+01:00 Stamp Club - Golden Sunrise Shopify API

Stamp Club - Golden Sunrise

Introducing 'Golden Sunrise' - the next great addition to our ever popular Stamp Club range! 


This unique collection includes a host of exquisitely designed sunlit scenery stamps and a selection of charming mix-and-match sentiments, each perfectly designed to complement your scene!


Don't forget, active Tonic Craft Kit Subscribers get 10% off their basket using the discount code "TCK" at checkout too!

]]>
https://www.marksymondsroofing.com/blogs/stamp-club/fin-tastic-mermaids 2022-08-02T12:56:42+01:00 2022-08-26T15:37:06+01:00 Stamp Club - Fin-tastic Mermaids Shopify API

Stamp Club - Fin-Tastic Mermaid

Introducing 'Fin-Tastic Mermaids' - the next great addition to our ever popular Stamp Club range! 


This delightful set features 20 enthralling aquatic stamps with a selection of playful mermaid and sea creature characters! Additional decorative elements - including sunken treasure, shells, pearls and bubbles - are included to make crafting your magical scene a sea breeze!


Don't forget, active Tonic Craft Kit Subscribers get 10% off their basket using the discount code "TCK" at checkout too!

]]>
https://www.marksymondsroofing.com/blogs/stamp-club/plantastic 2022-07-10T00:00:04+01:00 2022-09-13T09:06:27+01:00 Stamp Club - A Plantastic Set Shopify API

Stamp Club - Plantastic

Introducing 'Plantastic' - the next great addition to our ever popular Stamp Club range! 


This wonderful collection also features all your complementary fussy-cutting dies as well as additional die cut sprig elements and a sentiment banner to add yet more gorgeous detail.


Don't forget, active Tonic Craft Kit Subscribers get 10% off their basket using the discount code "TCK" at checkout too!

]]>
https://www.marksymondsroofing.com/blogs/stamp-club/aloha-paradise 2022-06-26T00:00:07+01:00 2022-06-30T15:50:48+01:00 Stamp Club - Aloha Paradise Shopify API

Stamp Club - Aloha Paradise

Introducing 'Aloha Paradise' - the next great addition to our ever popular Stamp Club range! 


This tropical paradise-inspired set features a host of beautifully illustrated iconic stamps, along with multiple mix-and-match sentiments! All the fussy-cutting dies are provided, as well as a host of extra adorable dies to make decorating your cards effortless.


Don't forget, active Tonic Craft Kit Subscribers get 10% off their basket using the discount code "TCK" at checkout too!

]]>
https://www.marksymondsroofing.com/blogs/stamp-club/stamp-club-hungry-honey-bears 2022-04-02T09:00:04+01:00 2022-05-30T11:58:08+01:00 Stamp Club - Hungry Honey Bears Shopify API

Stamp Club - Hungry Honey Bears

Introducing 'Hungry Honey Bears' - the next great addition to our ever popular Stamp Club range! 


This adorable collection features a host of beautifully illustrated bear, tree, bee and honey stamps, along with multiple mix-and-match, hilarious pun sentiment stamps!


Don't forget, active Tonic Craft Kit Subscribers get 10% off their basket using the discount code "TCK" at checkout too!

]]>
https://www.marksymondsroofing.com/blogs/stamp-club/picnic-party 2022-03-24T15:55:02+00:00 2022-04-14T09:40:19+01:00 Stamp Club - Picnic Party Shopify API

Stamp Club - Picnic Party

Introducing the Picnic Party Stamp Club - an exciting addition to our much-cherished Stamp Club range! 


The Picnic Party Stamp Club set features a host of superbly illustrated picnic inspired dies, along with multiple mix-and-match, hilarious pun sentiment stamps!  


It also features an essential background 'blanket' die, as well as iconic picnic dies such as cutlery, a wine glass and a lemonade jug.


Don't forget, active Tonic Craft Kit Subscribers get 10% off their basket using the discount code "TCK" at checkout too!

]]>
https://www.marksymondsroofing.com/blogs/stamp-club/delicious-desserts 2022-02-25T15:50:08+00:00 2022-03-04T16:42:31+00:00 Stamp Club - Delicious Desserts Shopify API

Stamp Club - Delicious Desserts

Get stamping and crafting this month with our brand new addition to the much loved Stamp Club range, Delicious Desserts.


Your Delicious Desserts Stamp Club collection features a host of scrummy stamps designed to create the most gorgeous sweet-treat inspired cards.


 Create scooped ice-cream cones, whipped ice-cream sundaes, milkshakes, cupcakes and more!


Don't forget, active Tonic Craft Kit Subscribers get 10% off their basket using the discount code "TCK" at checkout too!

]]>
https://www.marksymondsroofing.com/blogs/stamp-club/wildflower-wonderland 2022-01-28T15:50:03+00:00 2022-01-28T15:50:05+00:00 Stamp Club - Wildflower Wonderland Alex Crawley

Stamp Club - Wildflower Wonderland

Get stamping and crafting this month with our brand new addition to the much loved Stamp Club range, Wildflower Wonderland!


This unique die and stamp set includes a host of exquisitely designed floral detailing, including an elegant corner arrangement and a gorgeous frame. 


Adorable mix and match sentiments, each perfectly designed to complement the whimsical illustrative style of your floral elements!


Don't forget, active Tonic Craft Kit Subscribers get 10% off their basket using the discount code "TCK" at checkout too!

]]>
https://www.marksymondsroofing.com/blogs/stamp-club/campfire-critters 2021-12-20T14:07:32+00:00 2022-01-04T10:36:51+00:00 Stamp Club - Campfire Critters Shopify API

Stamp Club - Campfire Critters

Introducing the brand new Stamp Club - Campfire Critters - Stamp & Die Set!


Create truly adorable cards with this brand new addition to the Stamp Club range! 


This gorgeous collection includes a host of lovable wildlife & camping inspired dies & stamps, multiple sentiment pun stamps and, of course, all the dies you need to remove the fuss from fussy-cutting your stamped images!


Don't forget, active Tonic Craft Kit Subscribers get 10% off their basket using the discount code "TCK" at checkout too!

]]>
https://www.marksymondsroofing.com/blogs/stamp-club/milk-and-cookies 2021-11-09T13:00:00+00:00 2021-11-19T16:10:07+00:00 Stamp Club - Milk & Cookies Shopify API

Stamp Club - Milk & Cookies

Introducing the brand new Stamp Club - Milk & Cookies - Stamp & Die Set!


Create the most sumptuous, eye-catching cards with this brand new Milk & Cookies Stamp Club launch.


This gorgeous bundle includes a collection of milk & cookie inspired stamps, a host of hilarious pun stamps plus all the accompanying dies you'll need for effortless fussy-cutting!


Don't forget, active Tonic Craft Kit Subscribers get 10% off their basket using the discount code "TCK" at checkout too!

]]>
https://www.marksymondsroofing.com/blogs/stamp-club/stamp-club-hey-snowmie 2021-10-29T15:50:04+01:00 2022-03-03T14:01:53+00:00 Stamp Club - Hey Snowmie! Shopify API

Stamp Club - Hey Snowmie!

Introducing the brand new Stamp Club - Hey Snowmie! - Stamp & Die Set - inspired by Maria Willis!


Create fun, eye-catching, winter-themed cards and projects with our brand new Hey Snowmie! Stamp Club sets!


This incredible bundle includes a collection of fun snowmen and winter scene stamps, a host of hilarious pun stamps plus all the accompanying dies you'll need for effortless fussy-cutting!


Don't forget, active Tonic Craft Kit Subscribers get 10% off their basket using the discount code "TCK" at checkout too!

]]>
https://www.marksymondsroofing.com/blogs/stamp-club/stamp-club-little-monsters 2021-09-24T15:30:01+01:00 2021-10-22T12:59:36+01:00 Stamp Club - Little Monsters Shopify API

Stamp Club - Little Monsters

Introducing the brand new Stamp Club - Little Monsters - Stamp & Die Set - inspired by Maria Willis!


Create thrilling, eye-catching cards like no other with our brand new Stamp Club range of Monsters! 


This incredible bundle includes a collection of fun monster stamps, a host of hilarious pun stamps plus all the accompanying dies you'll need for effortless fussy-cutting!


Don't forget, active Tonic Craft Kit Subscribers get 10% off their basket using the discount code "TCK" at checkout too!

]]>
https://www.marksymondsroofing.com/blogs/stamp-club/christmas-rose 2021-07-30T16:29:16+01:00 2021-08-27T16:00:02+01:00 Stamp Club - Christmas Rose Shopify API

Stamp Club - Christmas Rose

Introducing our brand new Stamp Club - Christmas Rose - Stamp & Die Set - inspired by Maria Willis!


Create uniquely festive cards with this brand new addition to the marksymondsroofing Stamp Club range. 


Perfect for creating classically styled Christmas cards, this essential set offers unrivalled creative opportunities to both stamping and die-cutting enthusiasts!


Don't forget, active Tonic Craft Kit Subscribers get 10% off their basket using the discount code "TCK" at checkout too!

]]>
https://www.marksymondsroofing.com/blogs/stamp-club/patterns-and-prints 2021-07-30T16:00:16+01:00 2021-07-30T16:00:16+01:00 Stamp Club - Patterns & Prints Shopify API

Stamp Club - Patterns & Prints

Introducing our newest edition to Stamp Club, Patterns & Prints Stamp & Die Set inspired by Maria Willis!


Create show-stopping stamped backgrounds and big, bold statements with this brand new addition to the marksymondsroofing Stamp Club range. 


Ideal for creating grunge or distressed cards, this essential set features a host of stunning pattern and print effects - perfectly designed for the creative stamper looking to create eye-catching projects.


Don't forget, active Tonic Craft Kit Subscribers get 10% off their basket using the discount code "TCK" at checkout too!

]]>
https://www.marksymondsroofing.com/blogs/stamp-club/sunshine-and-sunflowers 2021-06-25T16:00:02+01:00 2021-07-14T13:23:28+01:00 Stamp Club - Sunshine & Sunflowers Shopify API

Stamp Club - Sunshine & Sunflowers

Introducing the tenth launch of our brand new Stamp Club - Sunshine & Sunflowers - Stamp & Die Set - inspired by Maria Willis!


Create bold and beautiful sunflower-themed cards with this brand new addition to the marksymondsroofing Stamp Club range. 


Perfect for fresh floral cards, this essential set offers unrivalled creative opportunities to both stamping and die-cutting enthusiasts!


Don't forget, active Tonic Craft Kit Subscribers get 10% off their basket using the discount code "TCK" at checkout too!

]]>
https://www.marksymondsroofing.com/blogs/stamp-club/shoot-for-the-stars 2021-05-28T16:00:01+01:00 2021-05-28T16:02:16+01:00 Shoot For The Stars Shopify API

Stamp Club - Shoot For The Stars

Introducing the ninth launch of our brand new Stamp Club - Shoot For The Stars - Stamp & Die Set - inspired by Maria Willis!


Create magical, starlight scene cards with this brand new addition to the marksymondsroofing Stamp Club range. 


Perfect for creating breath-taking starry night scenes, this essential set offers unrivalled creative opportunities to both stamping and die-cutting enthusiasts!


Don't forget, active Tonic Craft Kit Subscribers get 10% off their basket using the discount code "TCK" at checkout too!

]]>
https://www.marksymondsroofing.com/blogs/stamp-club/whaley-great 2021-04-30T16:00:00+01:00 2021-04-30T16:00:00+01:00 Stamp Club - Whaley Great Shopify API

Stamp Club - A Whaley Great Set

Introducing the eighth launch of our brand new Stamp Club - A Whaley Great Set - Stamp & Die Set - inspired by Maria Willis!


Create wonderful aquatic-themed cards with this brand new addition to the marksymondsroofing Stamp Club range.


Perfect for creating fun, underwater scene cards, this essential set offers unrivalled creative opportunities to both stamping and die-cutting enthusiasts!


Don't forget, active Tonic Craft Kit Subscribers get 10% off their basket using the discount code "TCK" at checkout too!

]]>
https://www.marksymondsroofing.com/blogs/stamp-club/i-love-you-fairy-much 2021-03-26T16:00:02+00:00 2021-03-26T16:46:23+00:00 Stamp Club - I Love You Fairy Much Shopify API

Stamp Club - I Love You Fairy Much

Introducing the seventh launch of our brand new Stamp Club - I Love You Fairy Much - inspired by Maria Willis!


Create gorgeous & magical fairy-themed cards with this brand new addition to the marksymondsroofing Stamp Club range, I Love You Fairy Much.


Don't forget, active Tonic Craft Kit Subscribers get 10% off their basket using the discount code "TCK" at checkout too!

]]>
https://www.marksymondsroofing.com/blogs/stamp-club/stamp-club-6-tutorial 2021-02-26T16:21:45+00:00 2021-02-26T16:37:16+00:00 Stamp Club 6 - Compassions and Poppies With Dawny P Shopify API
Crafter Dawny Phillips

Hello crafters – Dawny P here and welcome to this marksymondsroofing Stamp Club tutorial. Our latest set is all about Compassion and Poppies. So if you are after a card to say you are sorry, or sympathy, or just to let somebody know you are thinking about them, then this set is for you, and there’s even a birthday sentiment included.

It’s a set with stamps and corresponding dies, so no more fussy cutting!! For somebody like me who is rubbish at cutting out, this is an absolute bonus.

There’s also 6 different sentiments which work really well on their own, or you can mix and match them to make something a bit more bespoke. The stamps are the most beautiful poppies and flowers, plus some leaves and a stem. Then in the set of dies, you will get a die to cut out your blooms and leaves, plus 2 stem dies and 3 rectangle dies to create mats or frames. I think the leaves and dies would be handy for Christmas as well because you could use them as foliage for your wreath cards. And you can use the stamps to create backgrounds: ditto the stencil you are left with after cutting out your shapes.


So let’s go and make something using this awesome set. Even if you aren’t a confident stamper, this is a card you can easily make. I used my Tim Holtz Stamping Platform because it makes life a lot easier. 

Square handcrafted card with stamped poppies from this months Stamp Club set, a red frame and a black and white checkered bow

There’s also 6 different sentiments which work really well on their own, or you can mix and match them to make something a bit more bespoke. The stamps are the most beautiful poppies and flowers, plus some leaves and a stem. Then in the set of dies, you will get a die to cut out your blooms and leaves, plus 2 stem dies and 3 rectangle dies to create mats or frames. I think the leaves and dies would be handy for Christmas as well because you could use them as foliage for your wreath cards. And you can use the stamps to create backgrounds: ditto the stencil you are left with after cutting out your shapes.


So let’s go and make something using this awesome set. Even if you aren’t a confident stamper, this is a card you can easily make. I used my Tim Holtz Stamping Platform because it makes life a lot easier. 


So firstly, let’s do our stamping! 

Step 1

Three poppies stamped on white card using marksymondsroofing Hybrid ink in Black Shadow

Firstly stamp out 3 poppies from the set. I used marksymondsroofing Hybrid Ink in Black Shadow. 

Step 2

Stem from poppy stamp inked using marksymondsroofing black shadow ink pad and randomly stamped over a square white card

Still using Black Shadow, take the long stem stamp and randomly stamp it over a piece of white card measuring 5 ¾”. It doesn’t matter if it isn’t too neat because some of the centre will be covered up.

I have to say that I LOVE this quirky background. I will be doing this again for sure.

Step 3

Switching to Safari Green Nuvo ink pad ink and stamp out three stems onto another piece of white card

Now let’s switch to Nuvo - Ink Pad - Safari Green ink and stamp out 3 stems onto a piece of white card measuring 3 5/8” square.

Step 1

Three poppies stamped on white card using marksymondsroofing Hybrid ink in Black Shadow

Firstly stamp out 3 poppies from the set. I used marksymondsroofing Hybrid Ink in Black Shadow. 

Step 2

Stem from poppy stamp inked using marksymondsroofing black shadow ink pad and randomly stamped over a square white card

Still using Black Shadow, take the long stem stamp and randomly stamp it over a piece of white card measuring 5 ¾”. It doesn’t matter if it isn’t too neat because some of the centre will be covered up.

I have to say that I LOVE this quirky background. I will be doing this again for sure.

Step 4

Use Black Shadow ink pad to stamp a sentiment stamp that says Keep you in my heart on a trimmed down and narrow white card

Back to the Black Shadow ink now and stamp out our sentiment. Isn’t that font lovely!! Trim this down to leave a narrow border all around.

Step 5

Three stamped poppies have been coloured in using a red alcohol marker pen

Now colour in your poppies. You can use whatever medium you like to do this. If you aren’t a confident colourer (or you are in a rush), you can just stamp these straight onto some plain red card and they look just as nice.

Once you’ve done that, take the corresponding die and cut them out.

Step 6

The coloured in stamped poppies have been cut out using the matching die cutting set

Never in a million years would I get them to look as neat as that with scissors.

Step 3

Switching to Safari Green Nuvo ink pad ink and stamp out three stems onto another piece of white card

Now let’s switch to Nuvo - Ink Pad - Safari Green ink and stamp out 3 stems onto a piece of white card measuring 3 5/8” square.

Step 4

Use Black Shadow ink pad to stamp a sentiment stamp that says Keep you in my heart on a trimmed down and narrow white card

Back to the Black Shadow ink now and stamp out our sentiment. Isn’t that font lovely!! Trim this down to leave a narrow border all around.

Step 5

Three stamped poppies have been coloured in using a red alcohol marker pen

Now colour in your poppies. You can use whatever medium you like to do this. If you aren’t a confident colourer (or you are in a rush), you can just stamp these straight onto some plain red card and they look just as nice.

Once you’ve done that, take the corresponding die and cut them out.

Step 6

The coloured in stamped poppies have been cut out using the matching die cutting set

Never in a million years would I get them to look as neat as that with scissors.


OK, now we’ve done our colouring and stamping, let‘s make something nice to show it all off with.

This next bit is a quite pic heavy but I’ve broken it down into very simple steps which I hope you’ll find easy to follow.

We are going to make a sort of faux frame.

Step 7

Three pieces of square card to make a frame, the largest card is red, the medium card is white, and the smallest card in red

So you need to cut yourselves 3 squares. The largest is 5” square and this is the main card for the frame. Then cut another one that’s 3 1/2” square and finally one that’s 3” square – these are our templates. These can be cut from scrap card. I find it easier to cut 2 different colours.

Now find the centres on all sides and draw a cross lightly in pencil on all three pieces off card.

Step 8

The white card is placed on the large red card in the centre to draw around

Now place the largest template onto the main card, lining up the lines you’ve drawn and draw around the edges.

Once you’ve done that do the same with the smallest template.

Step 9

Guidelines are drawn on the large red card by drawing around the edges of the medium white card and small red card

You’ll end up with something that looks like this.

Step 7

Three pieces of square card to make a frame, the largest card is red, the medium card is white, and the smallest card in red

So you need to cut yourselves 3 squares. The largest is 5” square and this is the main card for the frame. Then cut another one that’s 3 1/2” square and finally one that’s 3” square – these are our templates. These can be cut from scrap card. I find it easier to cut 2 different colours.

Now find the centres on all sides and draw a cross lightly in pencil on all three pieces off card.

Step 8

The white card is placed on the large red card in the centre to draw around

Now place the largest template onto the main card, lining up the lines you’ve drawn and draw around the edges.

Once you’ve done that do the same with the smallest template.

Step 10

The red card now has score lines where the drawn-out guidelines from the medium and small card used to be

Now score around the lines you’ve drawn as shown. If you have a super trimmer, this bit is a doddle. If not, just use a ball tool and your score board.

Step 11

The large red card has been cut diagonally from corner to corner to make four triangles inside the score lines

Now cut from corner to corner as shown. Again the super trimmer is fab for this but just use your craft knife if not.

Rub out your pencil lines.

Step 12

The red card has been turned over and now has one of the triangle sections folded outwards on the first outside score line

Turn it over and fold outwards one section on the first scored line as shown – it’s the outer score line.

Step 9

Guidelines are drawn on the large red card by drawing around the edges of the medium white card and small red card

You’ll end up with something that looks like this.

Step 10

The red card now has score lines where the drawn-out guidelines from the medium and small card used to be

Now score around the lines you’ve drawn as shown. If you have a super trimmer, this bit is a doddle. If not, just use a ball tool and your score board.

Step 11

The large red card has been cut diagonally from corner to corner to make four triangles inside the score lines

Now cut from corner to corner as shown. Again the super trimmer is fab for this but just use your craft knife if not.

Rub out your pencil lines.

Step 12

The red card has been turned over and now has one of the triangle sections folded outwards on the first outside score line

Turn it over and fold outwards one section on the first scored line as shown – it’s the outer score line.

Step 13

Folded triangle section has been folded inward at the second inner scoreline

Now fold the same section inwards at the second (inner) score line so it looks like this.

Step 14

All triangles have now been folded like the first triangle

Repeat on all 4 sections. This is what it will look like from the back.

Step 15

Red card has been turned around to show what the front should look like

And this is what it will look like from the front.

Step 16

A new square red card has been cut and glued on the back of the triangle sections to keep them in place

Now cut yourself another square of red card approximately 4 ¼” square and glue it to the back to hold the sections in place.

Step 17

The red card is turned around so a square black card can fit inside the folded sections

Now cut a piece of black card 3 5/8” square. You may need to trim this a bit, depending on your fold lines. The idea is that it sits neatly in the recess as shown.

Once you’re happy, glue this down.

Step 18

The white card with randomly stamped black stems is glued on a slightly bigger red card

Now back to our funky background. Mat this onto a piece of red card slightly bigger. How much bigger will depend on what size border you want. I quite like a narrow border as you can see. Stick it down to the front of a 7” x 7”card base.

Step 19

The red frame is glued down onto the randomly stamped stem line background

Now take your faux frame and stick it down to the front of the card. 

Step 20

Poppies that are coloured in using a red alcohol marker are stuck down on the Safari Green stamped stems using foam pads

Now take your poppy heads and stick them onto the stamped stems. I used dimensional pads for this but you don’t have to.  

Step 21

The white card with the three poppies is glued inside of the red frame onto the black card

Stick this down onto the black card on the front of the card.  

Step 19

The red frame is glued down onto the randomly stamped stem line background

Now take your faux frame and stick it down to the front of the card. 

Step 20

Poppies that are coloured in using a red alcohol marker are stuck down on the Safari Green stamped stems using foam pads

Now take your poppy heads and stick them onto the stamped stems. I used dimensional pads for this but you don’t have to.  

Step 22

Keeping you in my heart stamped sentiment is stuck down onto the red frame below the poppies using foam pads

Glue down your trimmed sentiment to the front of the card onto the frame as shown. Again I used dimensional pads but you don’t have to. 

Step 23

A Black and white checkered bow is glued on to the top corner of the frame

Add a nice bow, and you are all done. 

Step 24

rectangle handmade thinking of you card with a black and white bow and three poppies on a spotty background

I used the same faux frame idea to make this card. 

This frame is rectangular and you just do the same as for the square. The rectangular dies in the set make really good templates for this. They’re what I used here.

Step 21

The white card with the three poppies is glued inside of the red frame onto the black card

Stick this down onto the black card on the front of the card.  

Step 22

Keeping you in my heart stamped sentiment is stuck down onto the red frame below the poppies using foam pads

Glue down your trimmed sentiment to the front of the card onto the frame as shown. Again I used dimensional pads but you don’t have to. 

Step 23

A Black and white checkered bow is glued on to the top corner of the frame

Add a nice bow, and you are all done. 

Step 24

rectangle handmade thinking of you card with a black and white bow and three poppies on a spotty background

I used the same faux frame idea to make this card. 

This frame is rectangular and you just do the same as for the square. The rectangular dies in the set make really good templates for this. They’re what I used here.

]]>
https://www.marksymondsroofing.com/blogs/stamp-club/compassions-poppies 2021-02-26T16:00:00+00:00 2021-02-26T16:36:58+00:00 Stamp Club Compassions & Poppies Shopify API

Stamp Club - Compassion & Poppies

Introducing the sixth launch of our brand new Stamp Club - Compassion & Poppies - inspired by Maria Willis!


Stamp pretty poppies and heartfelt sentiments with the latest addition to the Stamp Club range, Compassion & Poppies


Don't forget, active Tonic Craft Kit Subscribers get 10% off their basket using the discount code "TCK" at checkout too!

]]>
https://www.marksymondsroofing.com/blogs/stamp-club/stampclub-backgroundsborders 2021-01-29T16:01:34+00:00 2021-01-29T16:09:17+00:00 Stamp Club - Backgrounds & Borders Cameron McCann

Stamp Club - Backgrounds & Borders

Introducing the Fifth launch of our brand new Stamp Club - Backgrounds & Borders - inspired by Maria Willis!

This offering provides an array of wonderful floral designs - including an ingenious full background stamp - as well as a selection of wonderful sentiments.


Sold out

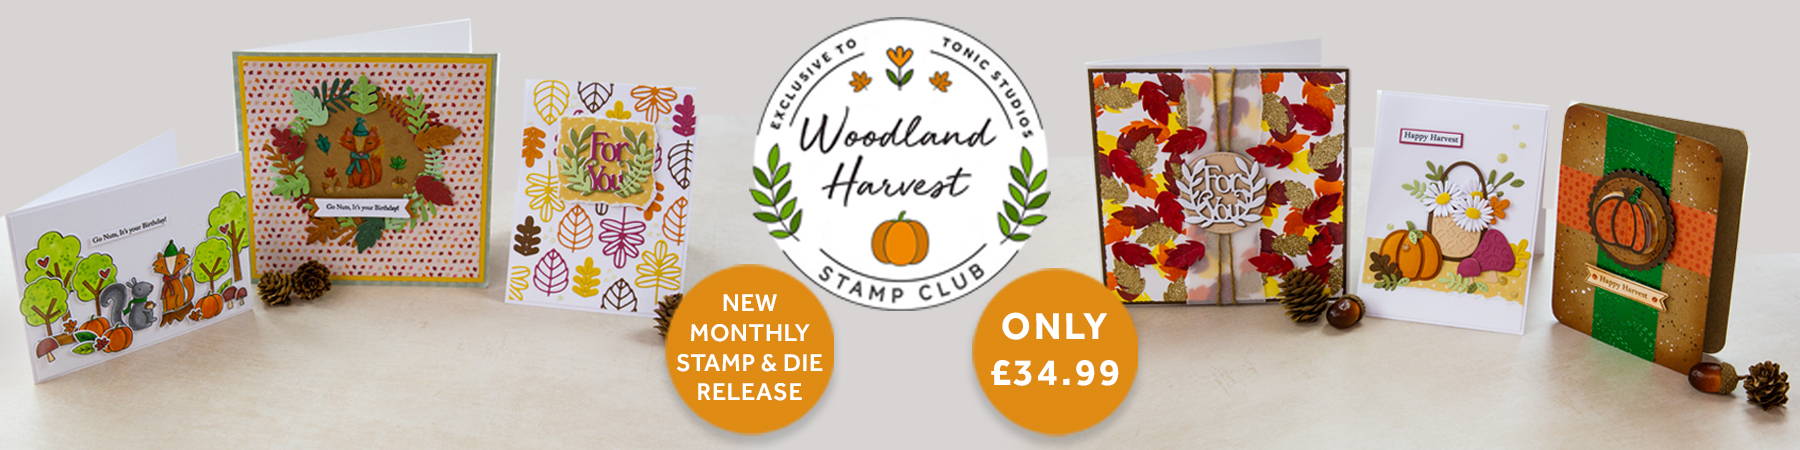
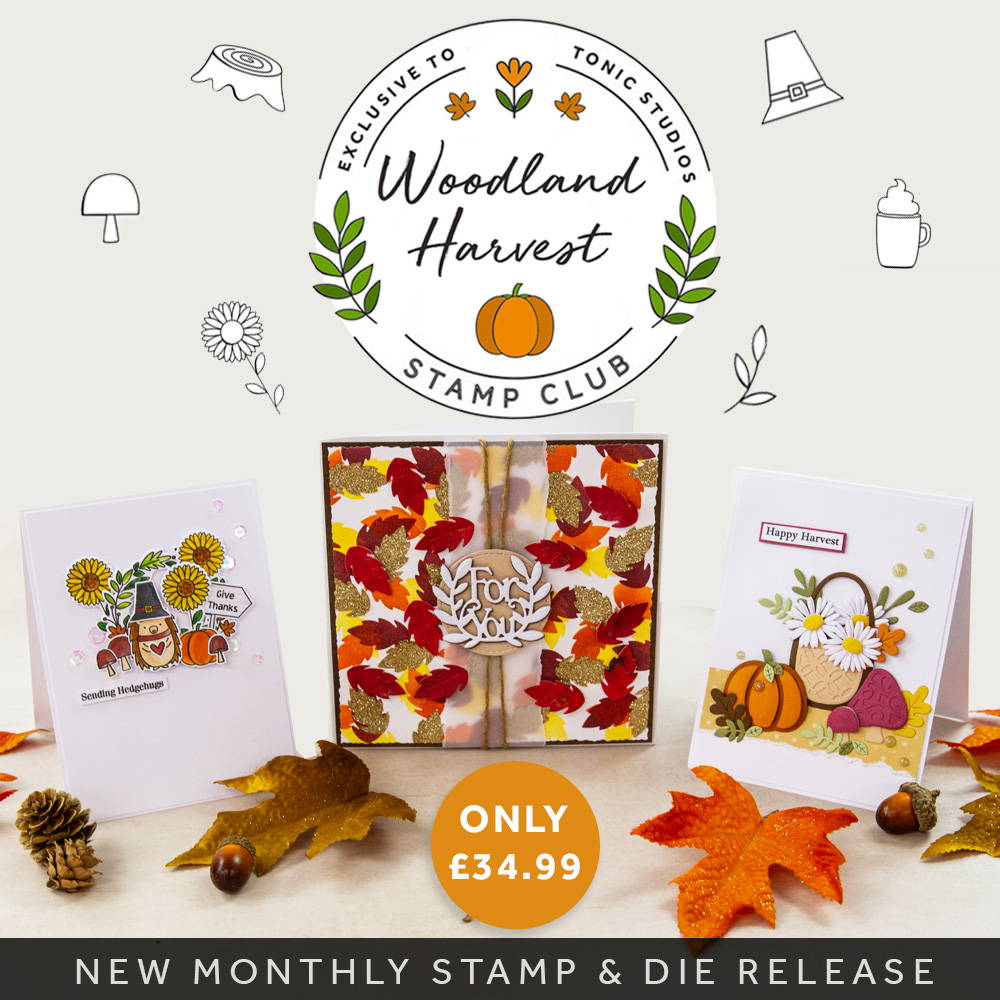
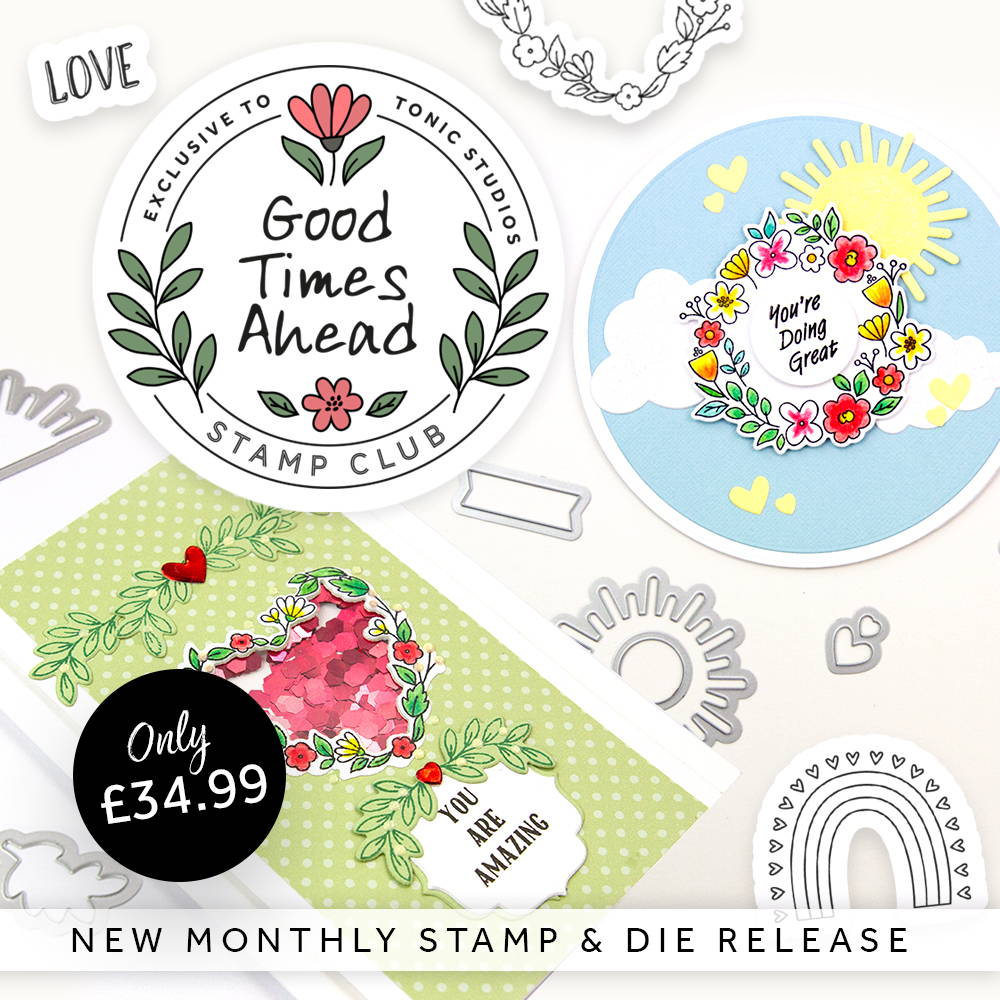
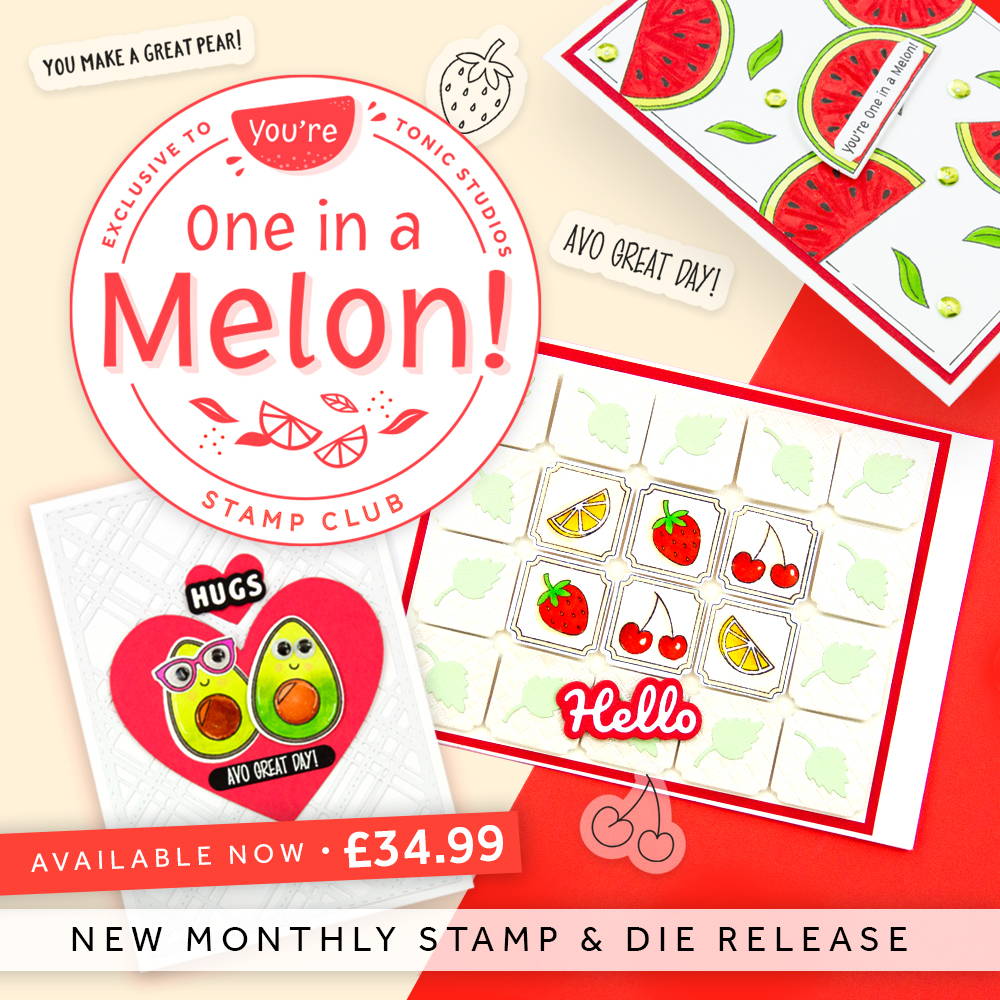
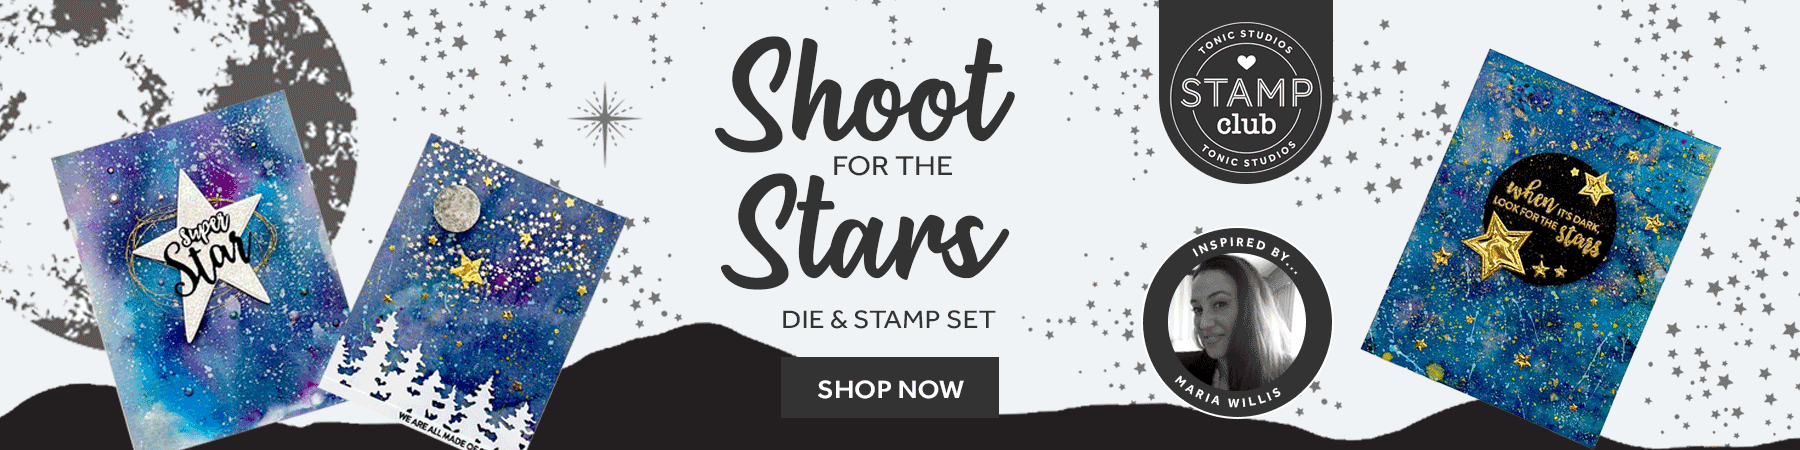
Create endless wonderful backgrounds with this brand new addition to the marksymondsroofing Stamp Club range. Designed to produce both eye-catching and subtle backgrounds, this must-have set is destined to be a go-to product for creative card makers and paper crafters alike!

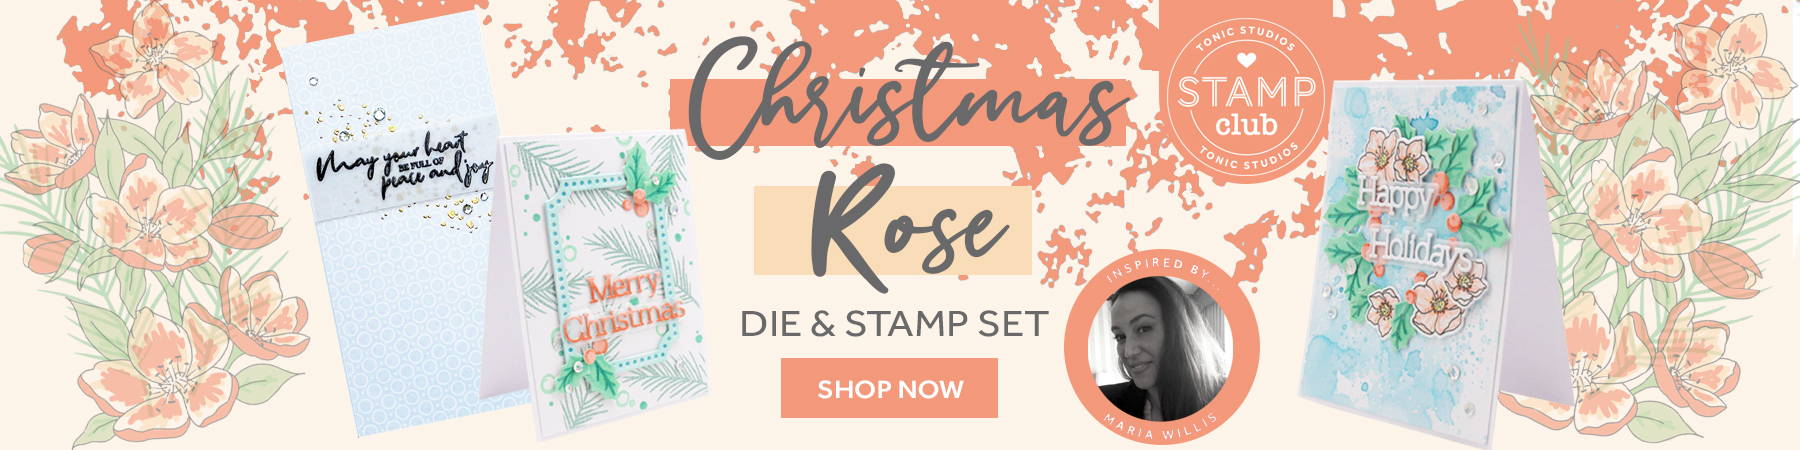
3746E - Background & Borders A5 6"x8" Stamp Set - inspired by Maria Willis

Set includes 18 stamps including several modern backgrounds and a selection of mix and match sentiments.

3747E - Background & Borders A5 6"x8" Die Set - inspired by Maria Willis

Set includes 18 dies designed to create beautiful die-cut backgrounds and sentiments which seamlessly complement the accompanying stamp set.

26mm x 158mm (1" x 6.25")

 Exclusive to marksymondsroofing

 Inspired by Maria Willis

 Each stamp and die set comes pre-packed in a handy storage wallet designed to fit our A5 storage folders.

 6x8" stamp and die set contains 18 stamps and 18 dies.

 The Backgrounds & Borders stamp and die will only be sold as a bundle.

 Not a club or subscription-based program but a small monthly stamp release.

 Limited Stock available

Inspiration from your favourite crafters...

Sold out

Create stunning envelopes for all your stamped card creations with this essential A5 6"x8" stamp set!

Designed to perfectly complement our Stamp Club offerings, this must have set features 37 quirky and cute stamps including a number of wonderful sentiments and postal themed icons.

Sold out

A selection of both simple and elegant banners designed to frame your sentiment stamps from the Stamp Club sets. Set includes 26 essential dies.

A5 6"x8" Die Set

Sold out

Want to store more than ever before?

For the first time, we're adding an A5 Die Case to our essential storage range. The new A5 storage folder gives you more room than ever before to store your die sets securely.

Including, six large magnetic sheets and inserts, looking after your dies the right way has never been easier.

Stamp Club - Backgrounds & Borders

Hi! My name is Maria Willis. I’ve been a lover of arts and crafts and homemade things my whole life. In 2015 I was introduced to stamping and card making. Since then I’ve a discovered a love for mixed media, exploring products in-depth to figure out all the ways I can use them, and making a big crafty mess! I’m so excited that I’m able to share the joy I get from crafting with you.

Borders & Backgrounds with Vianney Luna

Stamp Club Card Ideas With Shilpa Saleh

Bold Word Quartet With Christine Smith

Cardmaking With Lolly Palooza

Borders & Backgrounds With Ruth Hamilton

Up Close & Personal With Christine Smith

Backgrounds & Borders Card Ideas with Maria Willis


Weekend Saver Bundles

Sold out
Sold out
Sold out
Sold out
Sold out
Sold out
Sold out
Sold out
Sold out
Sold out
Sold out
Sold out

Don't forget, active Tonic Craft Kit Subscribers get 10% off their basket using the discount code "TCK" at checkout too!

]]>
https://www.marksymondsroofing.com/blogs/stamp-club/stamp-club-5-tutorial 2021-01-29T16:00:48+00:00 2021-01-29T16:00:50+00:00 Borders & Backgrounds Stamp Club Tutorial With Jen Kray Cameron McCann

Hi there! I’m Jen Kray and today is all about the NEW Stamp Club release – Backgrounds and Borders! This set is packed full of amazing repeating pattern stamps and word plate dies, both sets are 6 inches by 8 inches. This is an essential set as it will work with existing and future Stamp Club sets. Perfect for clean and simple cards as well as art journal pages, there is something for everyone this month. For my project today, I will focus on a repeating pattern stamp and a panel sentiment die. I really hope you love this month’s Stamp Club as much as I do.

Hi there! I’m Jen Kray and today is all about the NEW Stamp Club release – Backgrounds and Borders! This set is packed full of amazing repeating pattern stamps and word plate dies, both sets are 6 inches by 8 inches. This is an essential set as it will work with existing and future Stamp Club sets. Perfect for clean and simple cards as well as art journal pages, there is something for everyone this month. For my project today, I will focus on a repeating pattern stamp and a panel sentiment die. I really hope you love this month’s Stamp Club as much as I do.

Hi there! I’m Jen Kray and today is all about the NEW Stamp Club release – Backgrounds and Borders! This set is packed full of amazing repeating pattern stamps and word plate dies, both sets are 6 inches by 8 inches. This is an essential set as it will work with existing and future Stamp Club sets. Perfect for clean and simple cards as well as art journal pages, there is something for everyone this month. For my project today, I will focus on a repeating pattern stamp and a panel sentiment die. I really hope you love this month’s Stamp Club as much as I do.

Hi there! I’m Jen Kray and today is all about the NEW Stamp Club release – Backgrounds and Borders! This set is packed full of amazing repeating pattern stamps and word plate dies, both sets are 6 inches by 8 inches. This is an essential set as it will work with existing and future Stamp Club sets. Perfect for clean and simple cards as well as art journal pages, there is something for everyone this month. For my project today, I will focus on a repeating pattern stamp and a panel sentiment die. I really hope you love this month’s Stamp Club as much as I do.


What you will need

  • Tangerine die cutting machine
  • Tim Holtz Stamp Platform
  • Tim Holtz Glass Mat
  • Trimmer
  • Craft Perfect Black Cardstock / Watercolour Card
  • Scoreboard/Bone Folder
  • Paint Brush round, small
  • Clean water
  • Sequins, White/Black in for splatter
  • Aqua Flow Pens – Apple Red, Spiced Ginger, Lemon Zest, Sliced Kiwi, Evergreen Fern, Empress Teal, Clear Water, Blue Velvet, Wild Phlox, Indigo Dawn
  • Nuvo Hybrid ink – Black Shadow or any black in that is watercolour compatible
  • Removeable Tape, scissors
  • Adhesive -wet, red liner/tissue tape, foam pads
  • Sequins, White/Black in for splatter
  • Tangerine die cutting machine
  • Tim Holtz Stamp Platform
  • Tim Holtz Glass Mat
  • Trimmer
  • Craft Perfect Black Cardstock / Watercolour Card
  • Scoreboard/Bone Folder
  • Paint Brush round, small
  • Clean water

Step 1

Place your stamp onto a large piece of watercolour card. Line it up straight and over the to left as far as possible on your stamp platform. This will allow you to move the card for a repeating pattern.

Step 2

Move the card over until you can stamp right next to the first impression. This doesn’t have to line up exactly, as this adds to the charm of the project.

Step 3

Repeat 11 times.

Step 4

Rotate your watercolour card and stamp the ‘I’ and ‘Your Face’ with black ink.

Step 5

Die cut the LOVE panel into watercolour card.

Step 6

Adhere your stamped and die cut words onto black cardstock.

Step 7

Trim your words, leaving a small black border.

Step 8

Grab your Aqua Flow Pens: Apple Red, Spiced Ginger, Lemon Zest, Sliced Kiwi, Evergreen Fern, Empress Teal, Clear Water, Blue Velvet, Wild Phlox, Indigo Dawn.

Step 9

Using a basic rainbow theme, begin to colour in individual squares, blending the colours with water, starting with Apple Red, and Spiced Ginger.

Step 10

Continue, using Lemon Zest, and so on and so forth.

Step 11

Once your panel has been completed, allow to dry.

Step 12

The bottom of the stamp is left ‘open’, This allows to carry on with the pattern if you choose to. Today, you will need a black fineliner.

Step 13

Using your pen, close each square and allow to dry for a few minutes.

Step 14

Trim your panel to leave approx. 0.25 inch border and add sentiments using foam pads. Your panel will measure 3.15 inches by 6 inches.

Step 15

Create a black mat and layer 3.50 inches by 6.15 inches, and a card blank 7 inches by 4.25 inches.

Step 16

Adhere your panel and sentiments onto your card blank. Add white/black in splatter and sequins to finish.


I hope you’ve enjoyed this tutorial today and if you have any questions please leave me a comment and I’ll get back to you as soon as I can. Have a great day and I’ll see you soon! Take care and all the best. Lots of love, Jen xx

]]>
https://www.marksymondsroofing.com/blogs/stamp-club/stamp-club-4-tutorial 2020-12-26T00:00:00+00:00 2021-02-08T11:26:35+00:00 Shoot For the Moon Stamp Club Tutorial With Ruth Hamilton Cameron McCann

Stamp Club 4 is a set of stamps and coordinating dies which can be used together to create all sorts of creative mountain and moon scenes with trees and stars matching sentiments.

This set just cries out to be used with lots of Tonic's Nuvo products!


This is what you'll find in your set

What you'll need to create today's project

  • Stamp Club 4 dies and stamps
  • Craft Perfect 7x7 Bright White card blank
  • Craft Perfect A4 Nebula Purple Glitter Card
  • Craft Perfect A4 White Smooth Card
  • Craft Perfect A4 Chrome Silver High Gloss Card
  • Craft Perfect A4 Pearlised Card- Gleaming Lilac
  • Nuvo Hybrid Ink - Oriental Iris and Exotic Orchid
  • Nuvo Glacier Paste - Frosted Petal
  • Nuvo Glitter Accents - Fresh Snowfall
  • black ink
  • double sided tape
  • 3D foam tape/pads

These are the steps to make the card

Step 1

Tape a 15.25cm square of white card to your work surface. Die cut the circle and larger mountains from white card and attach with repositionable tape as shown.

Step 2

Use a blending brush or sponge to add purple and pink ink to the top of the card.

Step 1

Use a large blending brush to apply the Glacier paste over the ink, radiating from the centre of the moon.

Step 1

Remove the moon and mountains

Step 1

Die cut a sliver moon and attach over the moon shape left in the ink.

Step 1

Die cut the large mountains from Gleaming Lilac card and attach to the card with double sided tape.

Step 1

Stamp the mountains onto a piece of white card which is long enough to reach the bottom of your image panel, with black ink and die cut.

Step 1

Add some detail to the mountains with the glitter markers.

Step 1

Add Glitter Accents to the white area.

Step 1

Attach the inked mountains to the card with 3D foam tape and add Glitter Accents to the lilac mountains.

Step 1

Stamp the tree with black ink and fussy cut.

Step 1

Add the tree to the bottom left with 3D foam tape.

Step 1

Stamp the sentiment onto white card. Cut into a banner shape and ink the edges with the Oriental Iris ink. Add to the top of the card with 3D foam tape.

]]>
https://www.marksymondsroofing.com/blogs/stamp-club/stampclub-shootforthemoon 2020-12-25T23:59:01+00:00 2020-12-25T23:59:03+00:00 Stamp Club - Shoot For The Moon Cameron McCann

Stamp Club - Shoot For The Moon

Introducing the Forth launch of our brand new Stamp Club Shoot For The Moon - inspired by Maria Willis!

This offering provides an array of wonderful floral designs - including an ingenious full background stamp - as well as a selection of wonderful sentiments.


Sold out

Create dramatic midnight scenes with this beautiful and unique stamp set!

3723E - Shoot for the Moon A5 6"x8" Stamp Set - inspired by Maria Willis

Containing 15 stamps including 2 moons, a star-filled sky, a distant mountain range, both foreground and background trees and a host of fun sentiments, this must-have set is an essential addition to every serious stampers craft kit!

3724E - Shoot for the Moon A5 6"x8" Die Set - inspired by Maria Willis

Set includes 11 dies designed to take the effort out of fussy-cutting your Shoot for the Moon stamped images.

89mm x 102mm (3.5" x 4")

 Exclusive to marksymondsroofing

 Inspired by Maria Willis

 Each stamp and die set comes pre-packed in a handy storage wallet designed to fit our A5 storage folders.

 Not a club or subscription-based program but a small monthly stamp release.

 The Shoot For the Moon stamp and die will only be sold as a bundle.

 Limited Stock available

 6x8" stamp and die set contains 15 stamps and 11 dies.

Inspiration from your favourite crafters...

Sold out

Create stunning envelopes for all your stamped card creations with this essential A5 6"x8" stamp set!

Designed to perfectly complement our Stamp Club offerings, this must have set features 37 quirky and cute stamps including a number of wonderful sentiments and postal themed icons.

Sold out

A selection of both simple and elegant banners designed to frame your sentiment stamps from the Stamp Club sets. Set includes 26 essential dies.

A5 6"x8" Die Set

Sold out

Want to store more than ever before?

For the first time, we're adding an A5 Die Case to our essential storage range. The new A5 storage folder gives you more room than ever before to store your die sets securely.

Including, six large magnetic sheets and inserts, looking after your dies the right way has never been easier.

Stamp Club - Shoot For The Moon

Hi! My name is Maria Willis. I’ve been a lover of arts and crafts and homemade things my whole life. In 2015 I was introduced to stamping and card making. Since then I’ve a discovered a love for mixed media, exploring products in-depth to figure out all the ways I can use them, and making a big crafty mess! I’m so excited that I’m able to share the joy I get from crafting with you.

Shoot For The Moon With Maria Willis

Stamp Club Card Ideas With Shilpa Saleh

Glimmer Paste Galaxy With Christine Smith

Shoot For The Moon With Vianney Luna

Watercolour backgrounds With Jen Kray

Up Close & Personal With Christine Smith


Weekend Saver Bundles

Sold out
Sold out
Sold out
Sold out
Sold out
Sold out

Don't forget, active Tonic Craft Kit Subscribers get 10% off their basket using the discount code "TCK" at checkout too!

]]>