


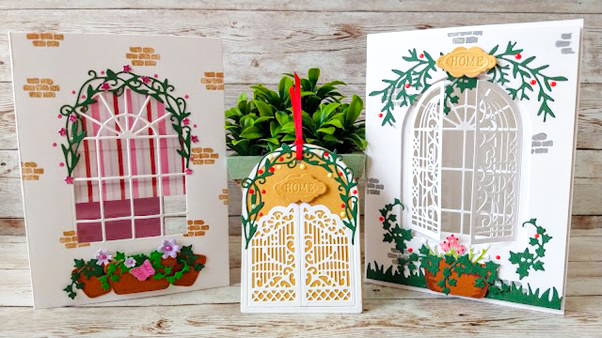
Hello :) Today, I'm giving you a review of the Wildflower Garden Kit from marksymondsroofing (No. 54, if you're counting!)
If you are completely new to the Tonic kits. You can check the link below,
which explains what the kit is, how to subscribe and how to buy it as a one-off subscription.
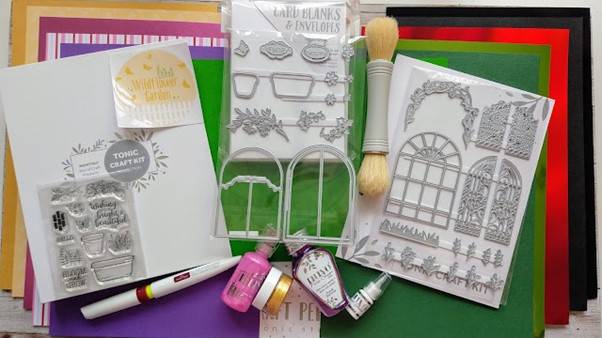
What you will need
- Gates and Garden Die Set
- Gates and Gardens Stamp Set
- Classic Card - Avocado Green
- Classic Card - Pine Tree Green
- Mirror Card - Glossy Black
- Mirror Card - Holly Green
- Mirror Card - Pink Chiffon
- Iridescent Mirror Card - Firestone Red
- Pearlescent Card - Onyx Black
- Pearlescent Card - Lemon Lustre
- Patterned A4 Sheets kit 54- Wildflower Garden
- A6 Cards Blanks and Envelopes - Bright White
- Aqua Flow - Arabian Nights
- Pure Sheen Glitter - Purple Glitter
- Crystal Drop - Pink Orchid
- Mini Embellishment Mousse - Indian Gold
- Mini Crystal Glaze - Clear
- Dual Ended Blender Brush
- Craft Kit Wallet
- Craft Kit Binder
- Craft Kit Sticker

Here's a closer look at the Nuvo products in this kit!
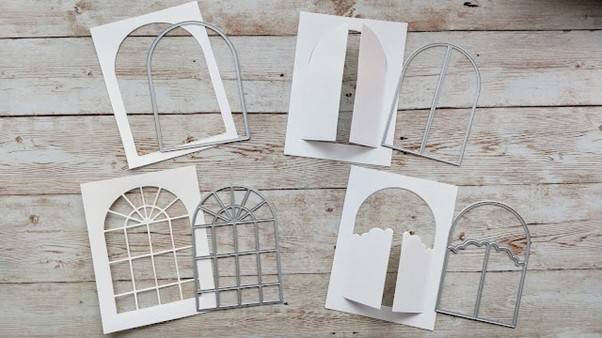
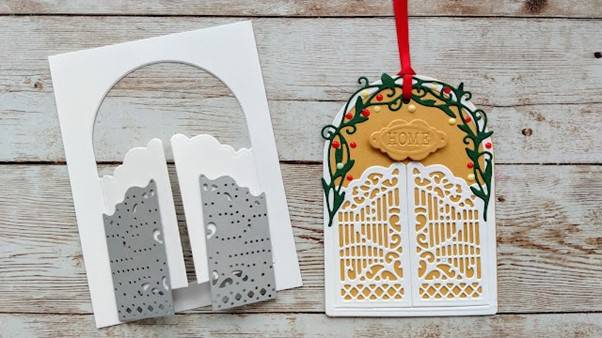
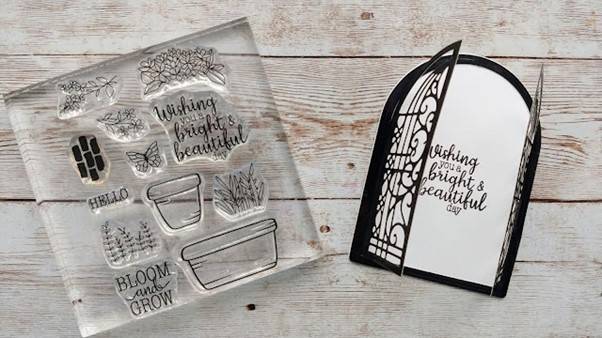
The top left die can be used on its own to create an arched aperture in the card and you will also have the die cut from the centre to attach to your card.
The top right die has a combination of cutting and scoring lines which create a centre opening window/gate.
The bottom left die is a "verso" die which cuts the window into your card,
The bottom right die cuts the top shape completely out and leaves shutters below.
Die Set Combinations
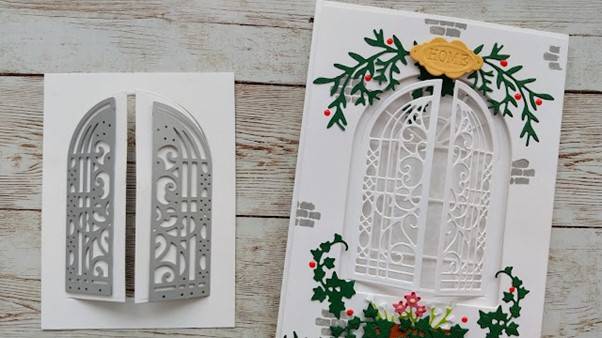
The decorative gate/ shutter dies can be used with the die cut shown to create a beautiful wrought iron look gate/ shutter. This would look fantastic in silver or black mirror card!
The longer decorative dies can be used with the long shutter.
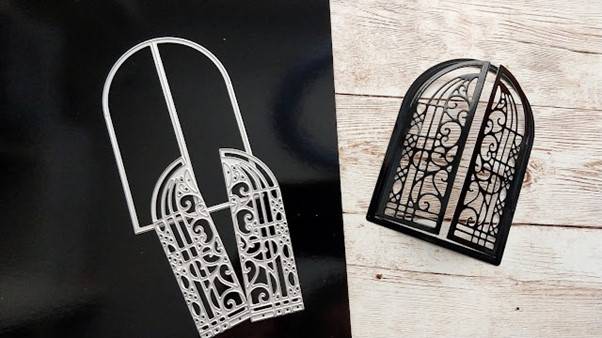

This die takes on a completely different look when it's cut from the Glossy Black Mirror Card in the kit!
How to assemble a blind
I loved the idea of adding a little blind behind the window (you will need to add a piece of acetate first)
and here's how you can make one.
Step 1
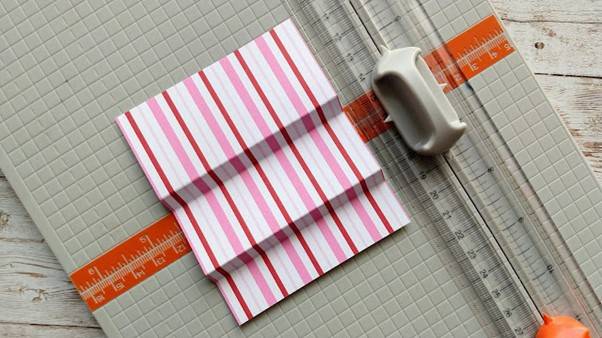
Cut a piece of the double sided patterned paper from the kit to 8cm x 11cm and score at 4cm, 5cm, 8cm and 9cm.
Step 2
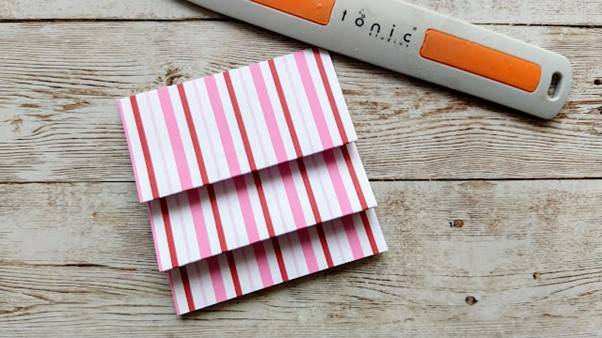
Crease all the score lines with a bone folder.
Step 3

Turn the blind over and add a tiny piece of double sided tape into the centres of the folded sections to hold them down.
Step 4
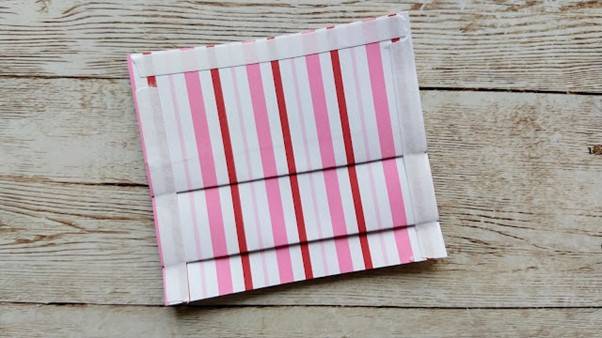
Attach double sided tape to the top and sides on the right side of the blind and attach these to the card behind the acetate.
Finished Blind
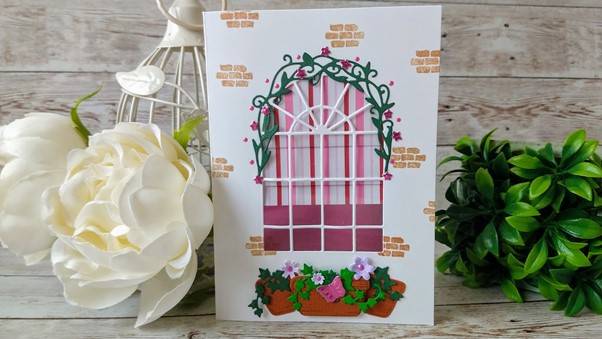
Flower Pots
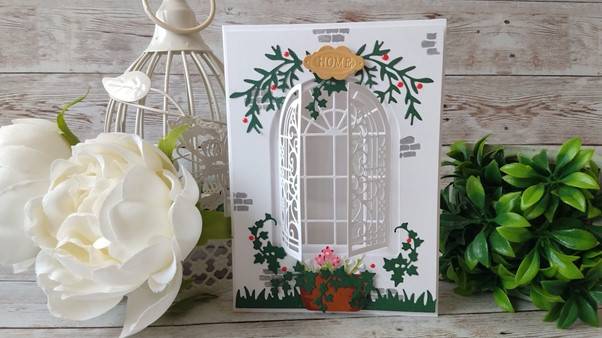
In the card left, with the blind, and the card above with the window and shutters, you can see how you can add different combinations of flower pots (both stamped and die cut) with foliage and flowers to the window /gate scene.
Another idea is to add a stamped sentiment behind the shutters.
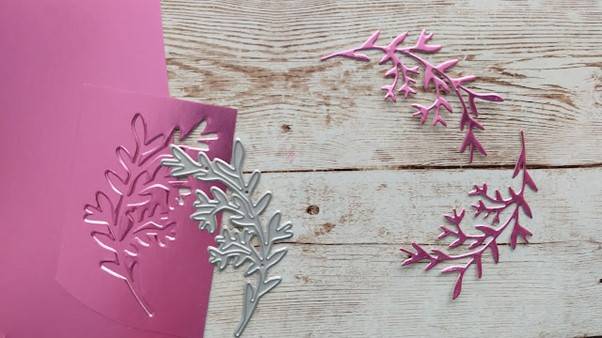
Don't forget that the foliage dies can look awesome in mirror card!

Buy The Craft Project
